
The UP Couple
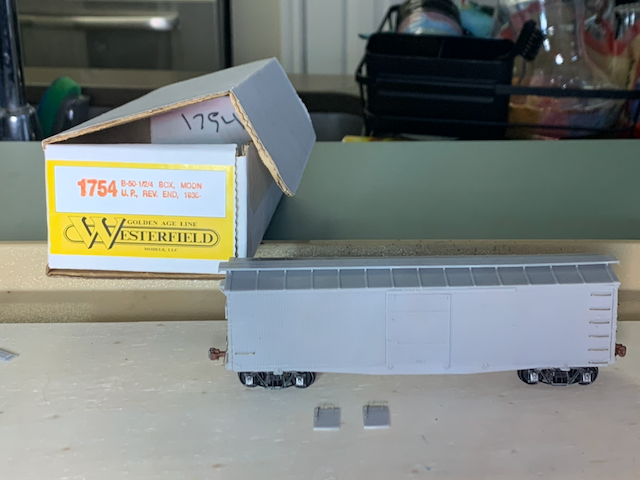
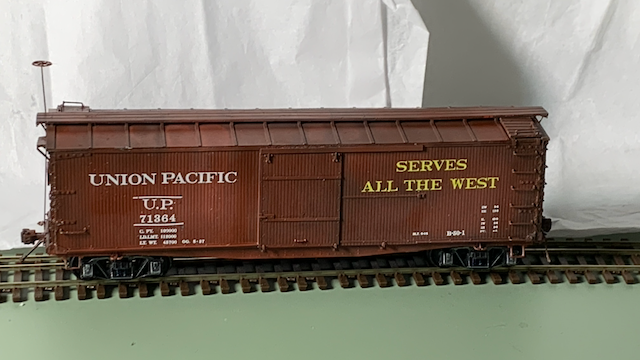
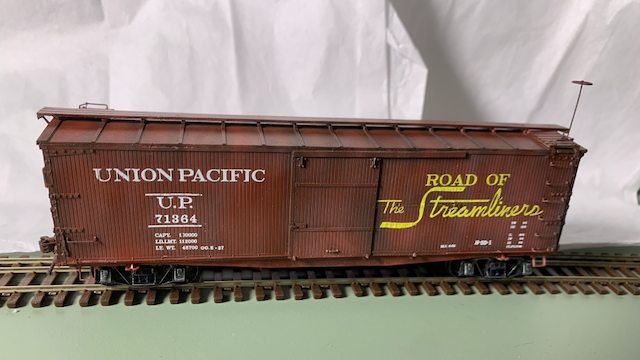
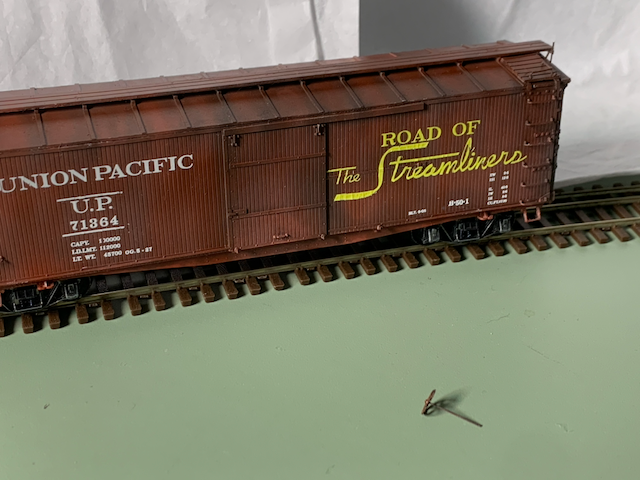
In the last few years I acquired two Union Pacific box car resin kits: A Westerfield B50-1 wooden prototype and a Funero & Camerlengo “PS-0” steel prototype, which I have designated Projects Gable and Lombard, respectively.
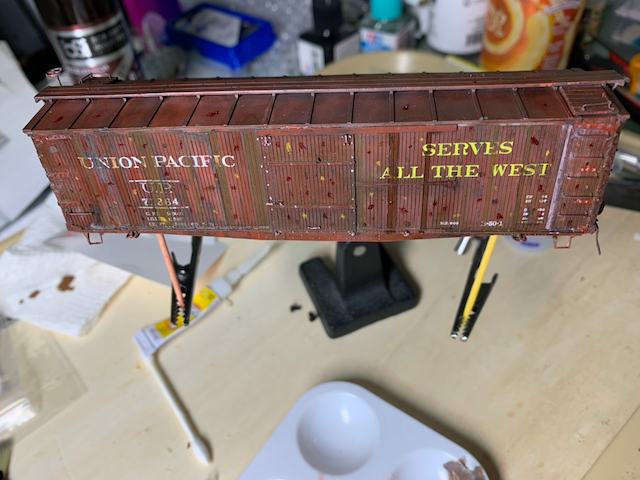
Here we see how Project Gable came together.
Project Gable and the B50 Box Car Model
From the Westerfield product description:
Operating Era: 1904-1953. THIS SERIES NOW COMES WITH OUR NEW ONE-PIECE ROOF FRAME. Southern Pacific, Union Pacific, Illinois Central, Central Pacific, Oregon & California, Houston & Texas Central, Chicago & Alton. The Harriman standard 40′ box car was designed for all the roads Harriman controlled in the early 1900’s. One of the first steel underframe designs, almost 19,000 were built between 1904 and 1909. UP and IC cars were rebuilt in the 1920’s with steel ends; many SP and UP cars wound up in MOW service. PLEASE SEE OUR #12400 SERIES KITS FOR B-50-5 DS BOX CAR KITS.
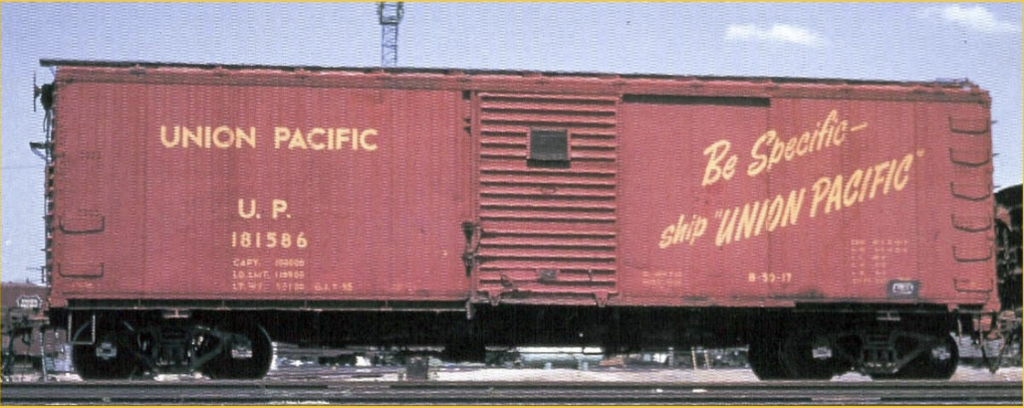
Photos of the B50 prototype are apparently scarce, though my own research was limited to what is free online. The Westerfield instruction booklet has a photocopied image of the B50-2 model as delivered to the Chicago & Alton.
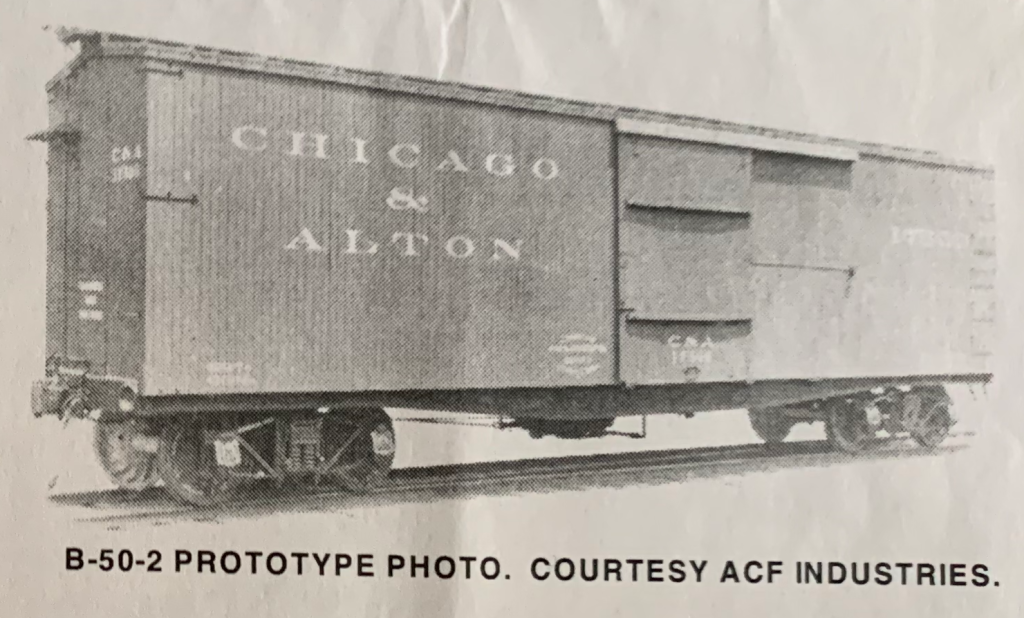
Note the arch bar trucks and lack of grabiron(s) on the lower left.
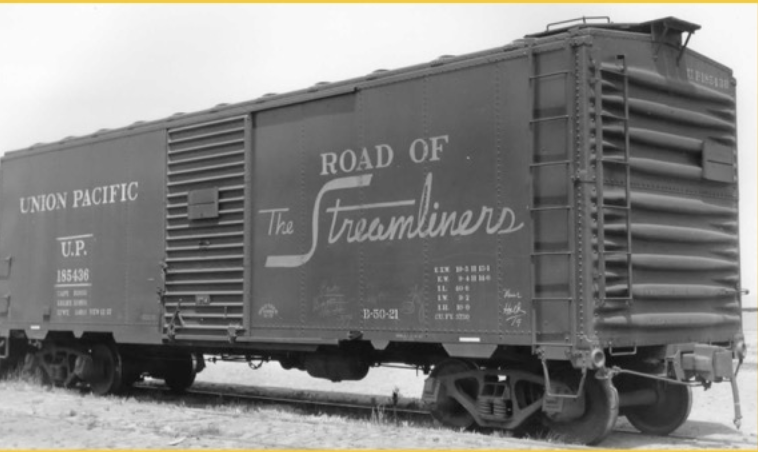
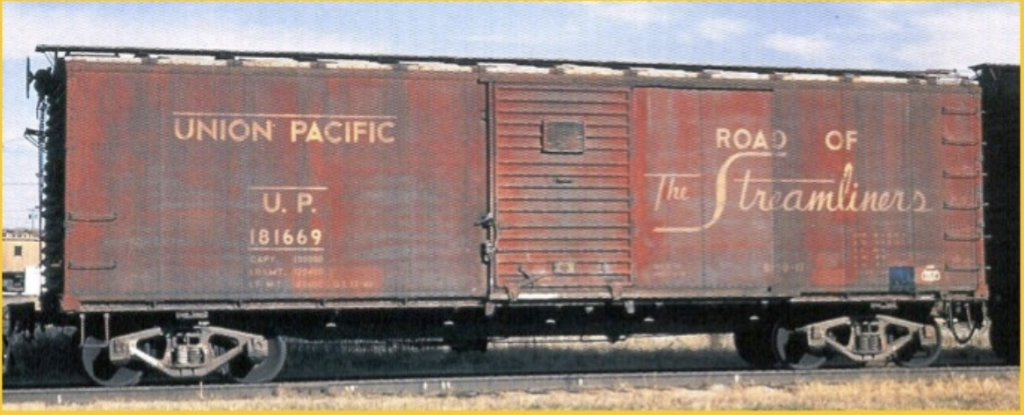
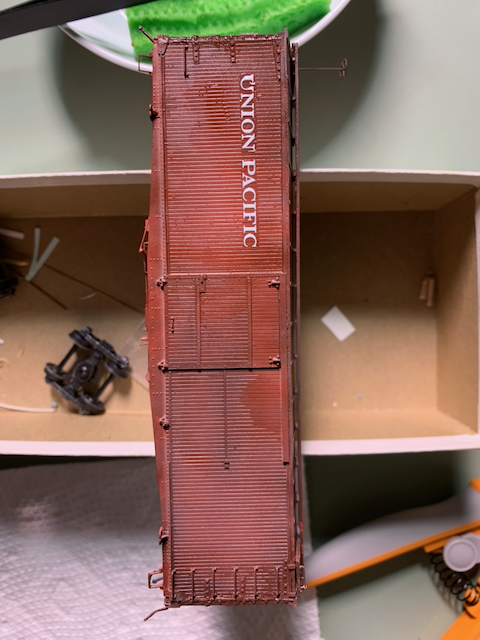
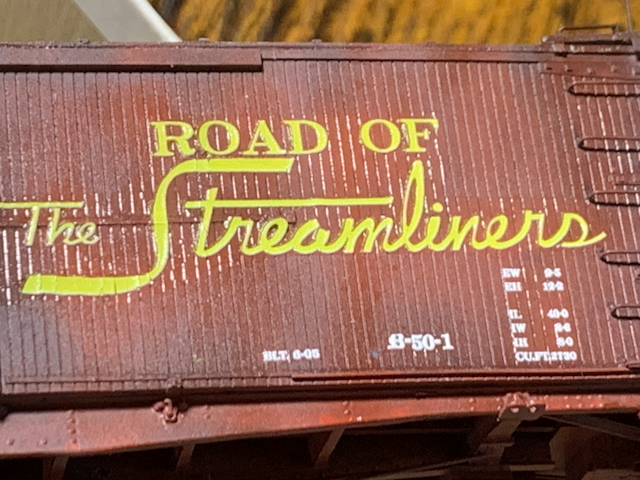
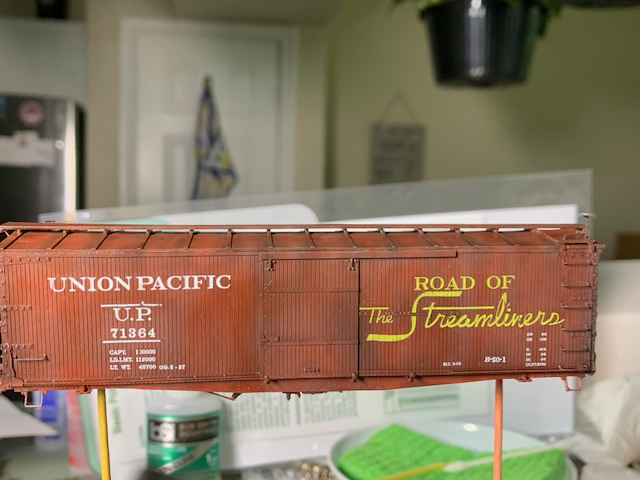
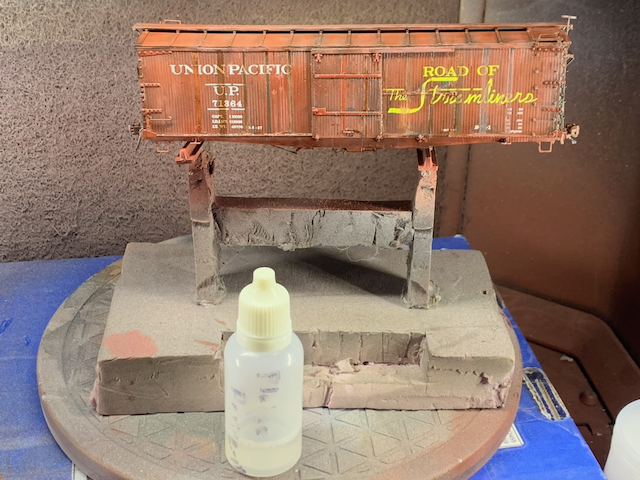
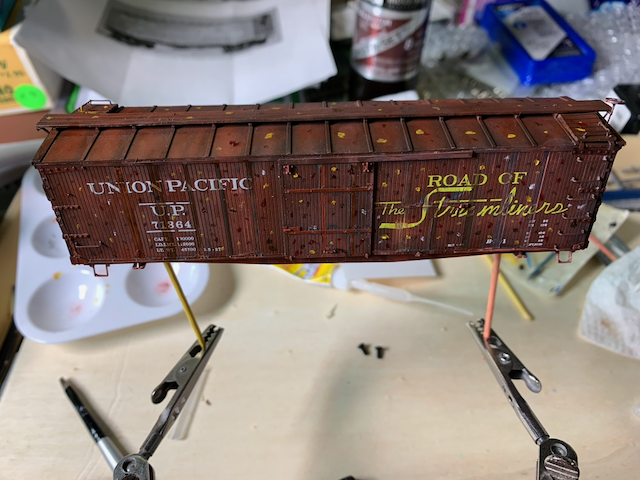
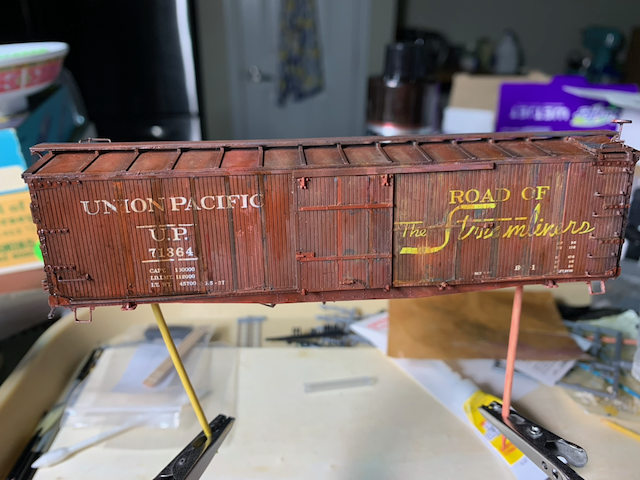
Gable will be built in the modernized B50-1 specification with KC brakes, a brake staff, and 1936 lettering with the wonderful Road of the Streamliners logo, shown here on a different box car prototype around 1939 (sourced from here):
Main Assembly
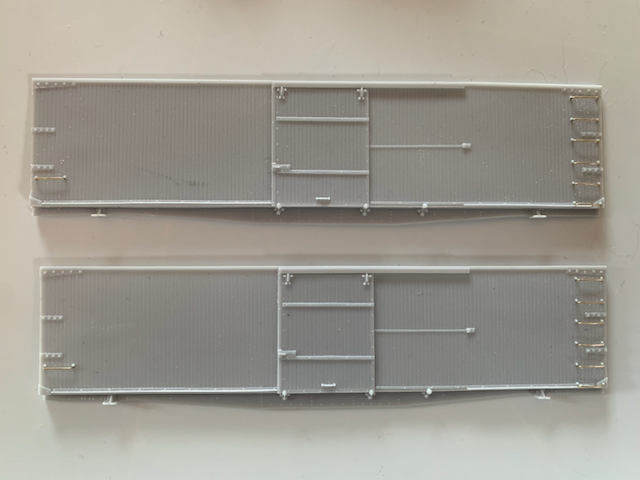
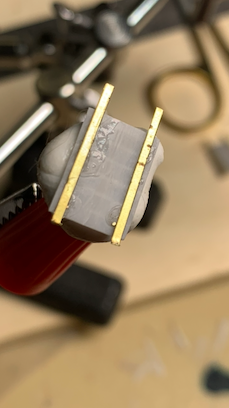
For me, the most difficult part of a resin kit of a wooden box car is the large number of grabirons requiring drilling #79 holes. Here that process was surprisingly smooth. The sides were decorated with grabirons before assembly:
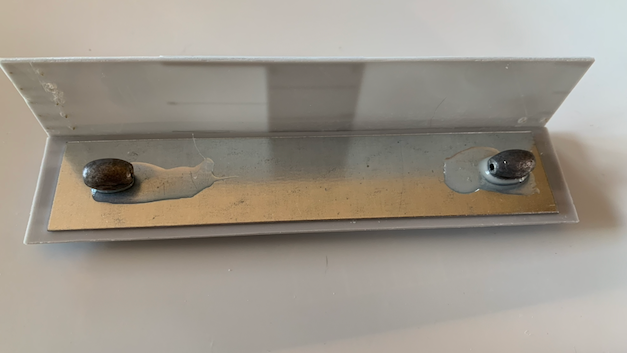
The floor was appropriately weighted with old fishing lures:
Both sides on the floor:

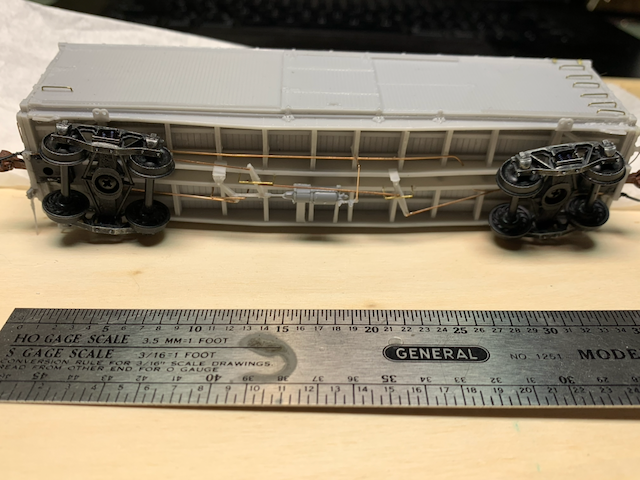
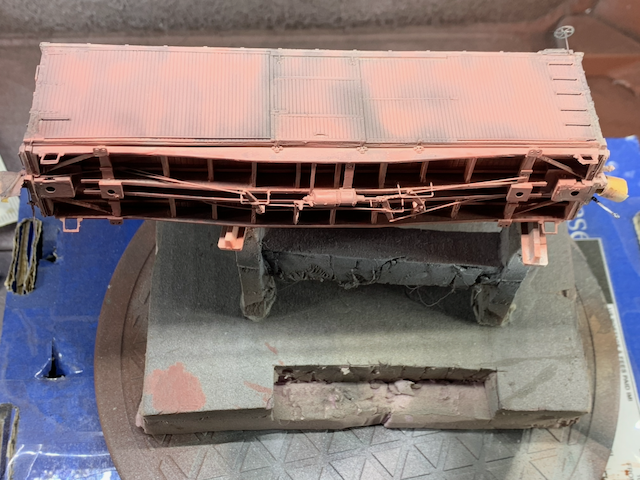
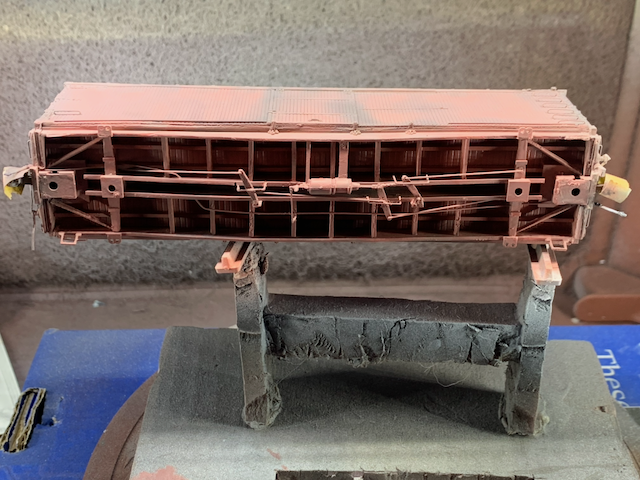
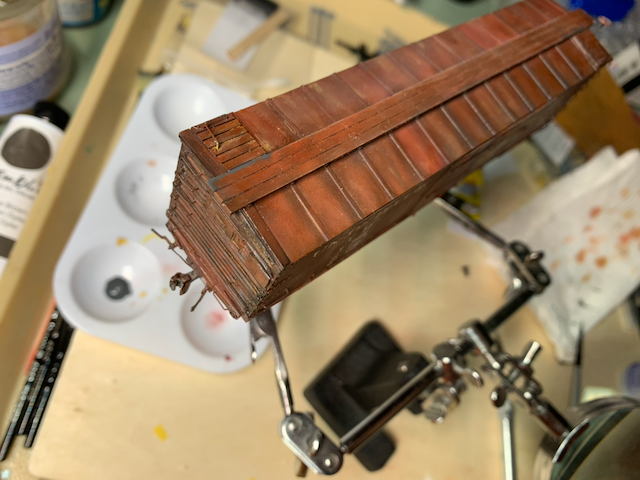
The ends and roof went on similarly, and then it was time to tackle the underside (see below for post-assembly):
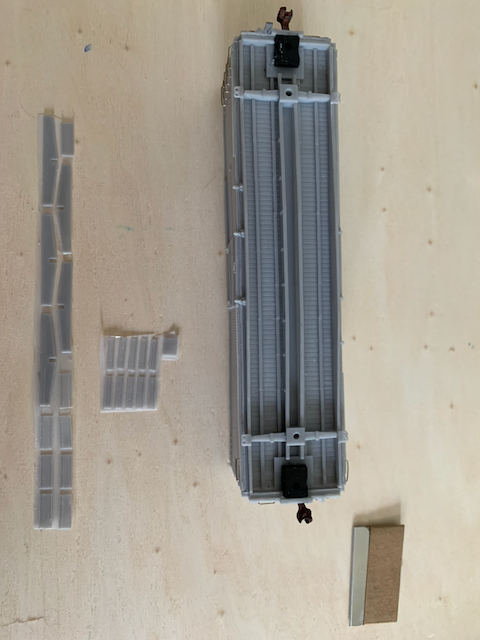
Now the roof walks:
Note the Andrews trucks.
The ends were detailed next, including brake hoses and cut levers.

The brake wheel was sanded out of the flashing and, regrettably, added without remembering to cut the “stalk” of the brake to a more reasonable height:
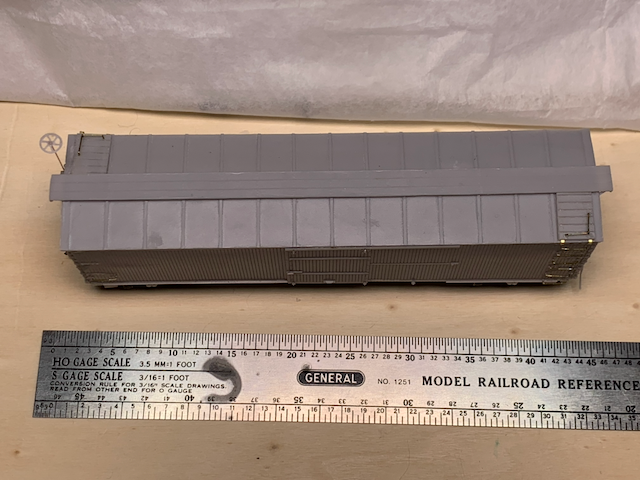
I tried to use the kit’s resin cut levers, but one of them ended up being problematic so I had to replace it with a metal version from Yarmouth Model Works (RIP).
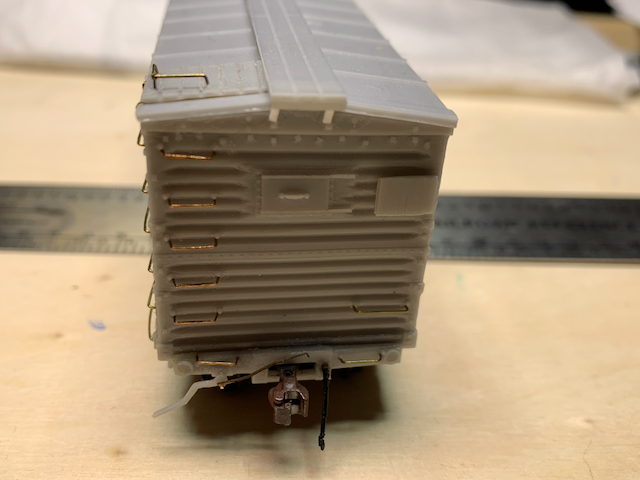
Here is the KC brake apparatus. Assembly was mostly straightforward, with the ribs providing a bit of a challenge.
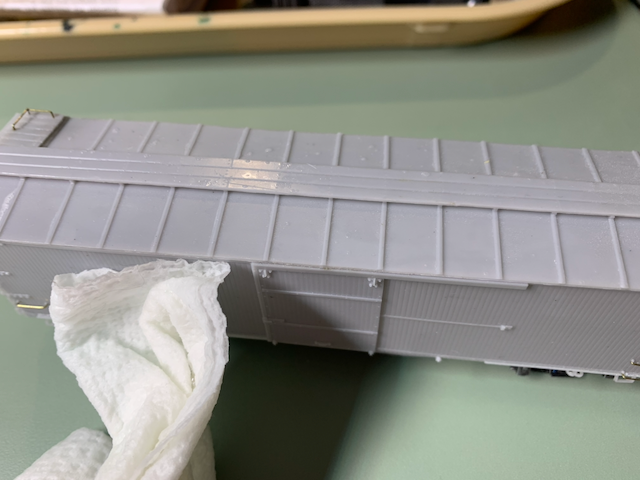
With assembly complete, it was time to wash and paint.
A Layered Paint Job
As one learns from model building YouTube: armor, military, and jet modelers are typically more advanced than model railroaders when it comes to painting and finishing. Let’s apply some of their modeling wisdom here: (i) dark preshading; (ii) lighter highlighting; (iii) basecoat; (iv) progressively lighter shading; and (v) darker panel lining and pin washes before further weathering.
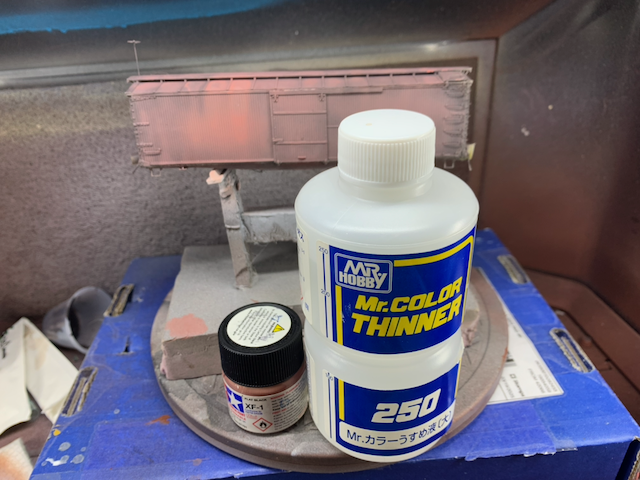
The primer was Mr. Finishing Surfacer 1500 white; next a layer of Tamiya XF-1 flat black along panel edges and details. Unfortunately I have no photographic documentation of this step.
Looking at color photos for how UP cars age was enlightening. The prototype basecoat wears away to reveal a dark gray and at the same time, it slightly lightens/bleaches to become lighter in patches:
The only color photo of a UP wooden box car I could readily find shows how the details should be painted – such as the black door highlights – and hints at some key properties to highlight during weathering – such as the visibility of individual boards on the side:
The main paint job on the prototype was, after ~1937, synthetic paint car red: Harriman-era Common Standard (C.S.) 22 – No. 11 Metallic. This is sufficiently captured by Tru-Color TCP-180 Union Pacific 1944-1960s freight car red.
Highlight Layer
I could not escape a sense that there is some pink embedded in the aging box car. The panel highlight color was determined to reflect this fact: earthpink was mixed using Tamiya paints:
2 parts XF-2 flat white
2 parts XF-7 flat red
1 part FX-52 flat earth
The result is a pinkish brown layer that nicely reflects what I was going for:
Basecoat Layer
I did not have any Tru-Color paint, so I made a quick trip to Charles Ro where they happened to have ancient bottles of the exact color I needed at a discount. The catch being that the paint was so old, the solvent had evaporated so I took the chance that I would be able to reconstitute it with Mr. Color thinner:
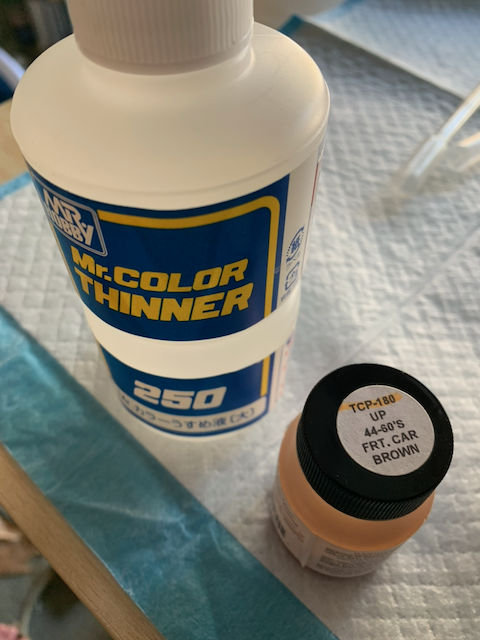
Luckily that worked perfectly and I added a transparent layer of UP freight car brown:

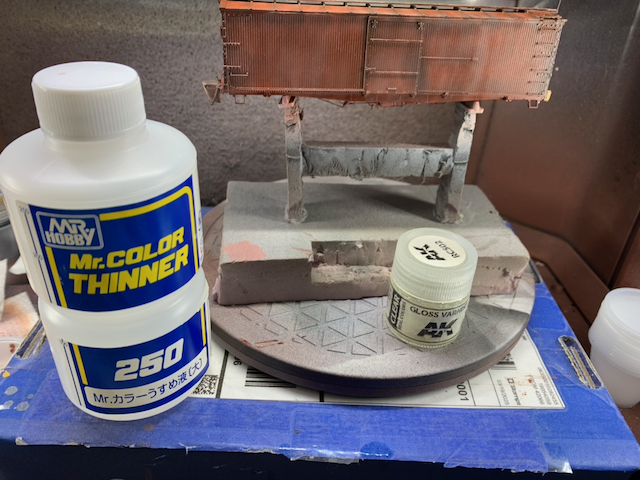
For decaling, a thin layer of gloss varnish:
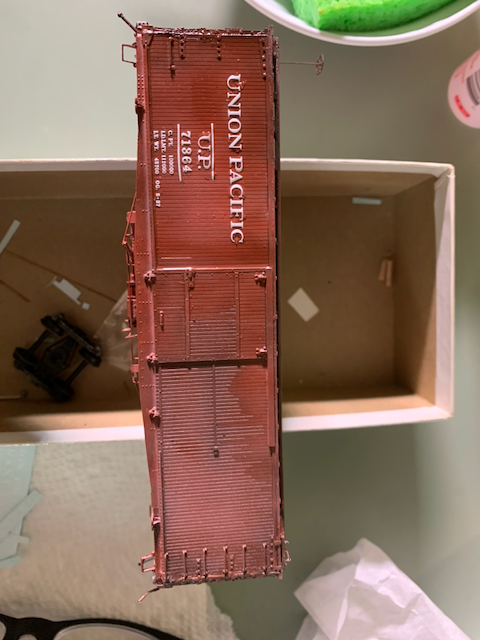
Decaling a Large Logo
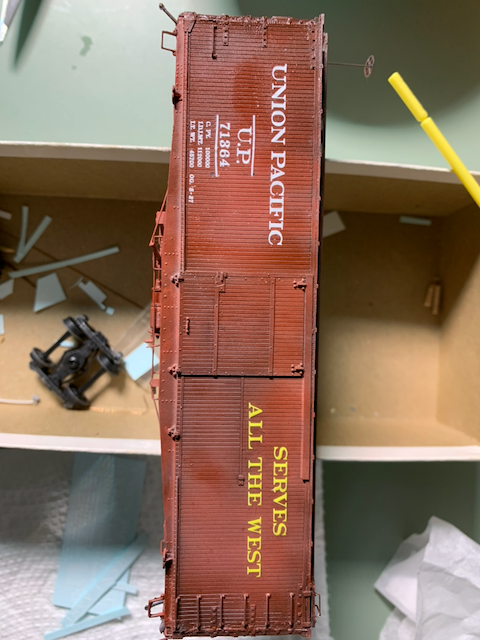
The decals for this kit are in two parts: white Roman lettering and yellow slogan lettering that is part Roman and part Gothic. The time period after 1936 and before 1940 is approximately when this configuration would be used.
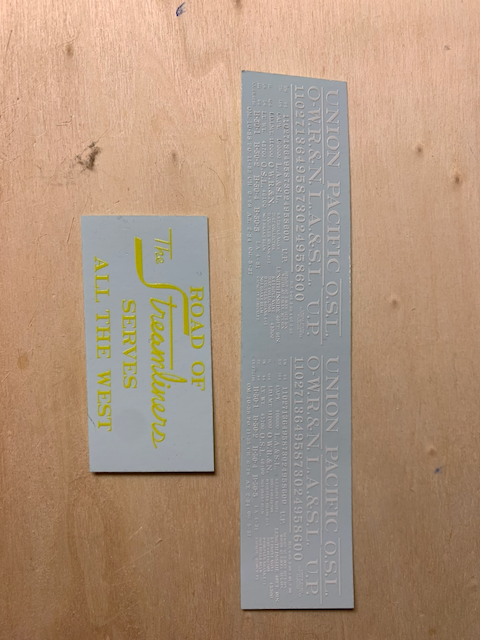
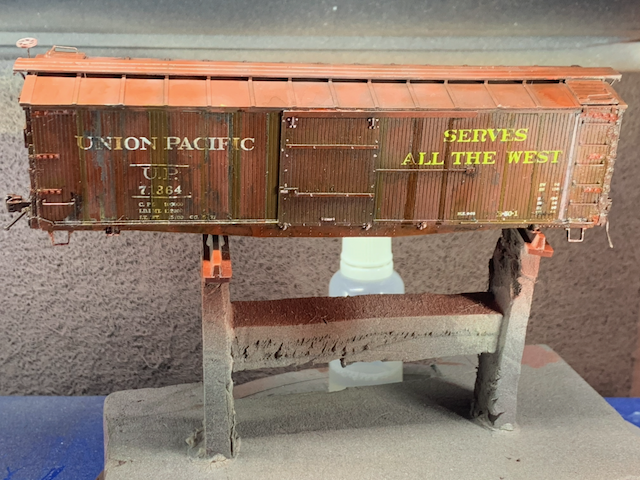
The main Union Pacific herald:
I flooded the side with MicroSet to align the decals:
The thin stripes above U.P. and below the number were the most fiddly:
By the second side, I was already more confident:
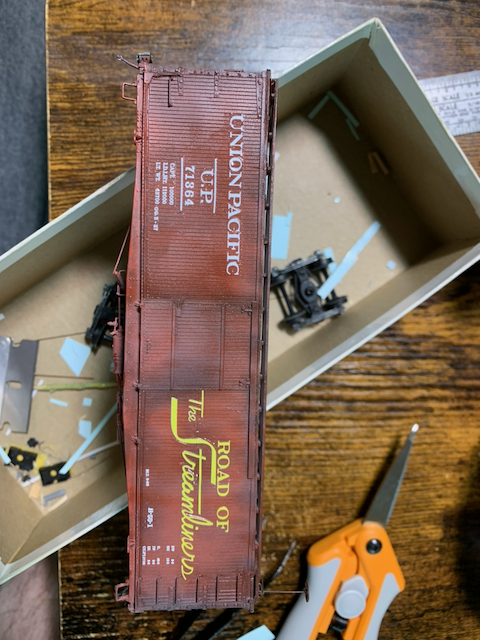
The Road of the Streamliners slogan is the largest decal I have applied to date. Here, I was concerned with getting it to settle in between the boards. I would later slice the logo along the board lines, which was the most intimidating thing I have done on this model.
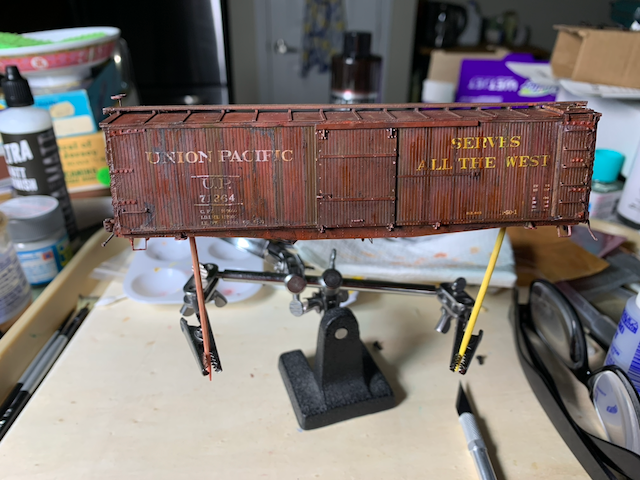
By now, the model was almost complete. I just needed to fix that annoyingly tall brakestaff and weather it.
I could not rescue the brakewheel; a new one would be applied:
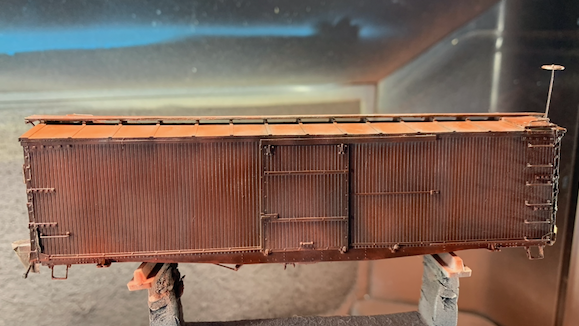
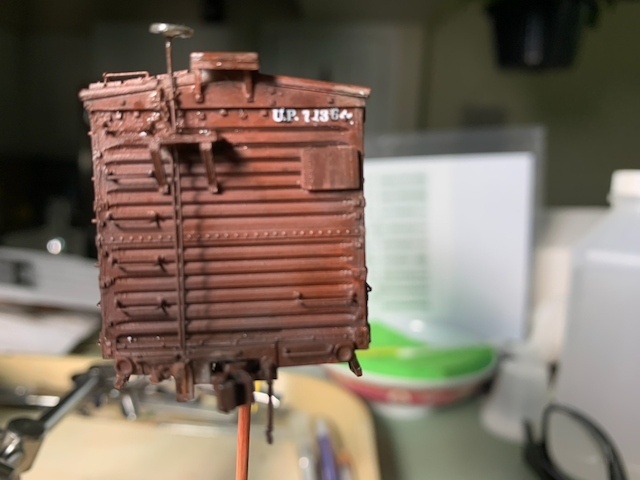
Weathering Gable
Here is where things go a bit out of control. I wanted Gable to be more weatherbeaten than its future partner Lombard, and I achieved that – and then some.
First, panel lining with Tamiya dark brown:

The effect is subtle – especially with my amateurish lighting. But in person, it nicely throws the individual boards into contrast.
Tragically, the replacement brakewheel is a bit out of scale:
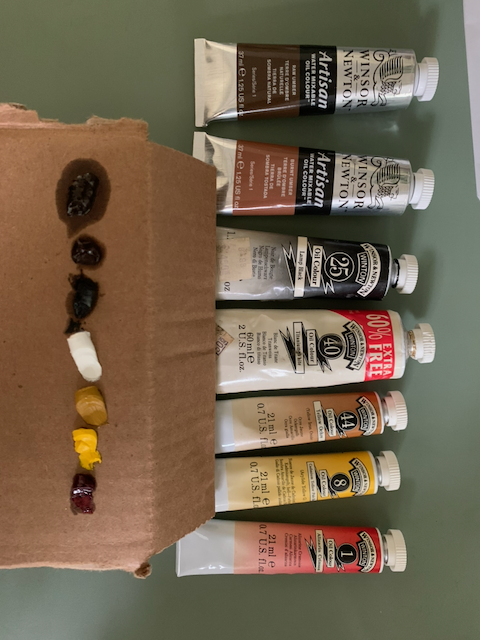
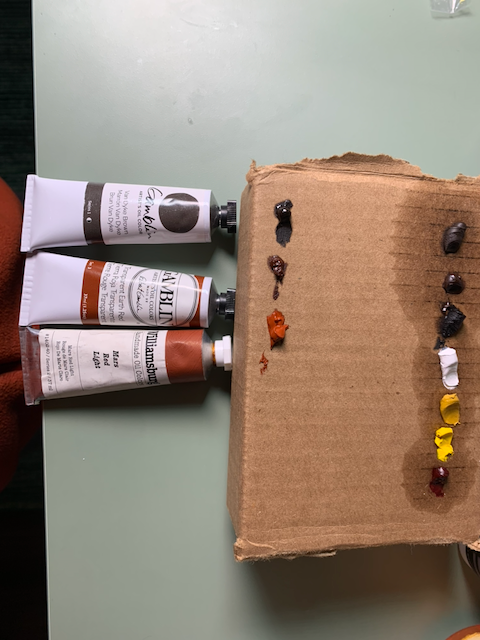
This project is my introduction to oil weathering. First I applied all my earthy and organic colors to cardboard, then let it sit for a few days to leech the linseed oil, a necessary step for fast oil drying.
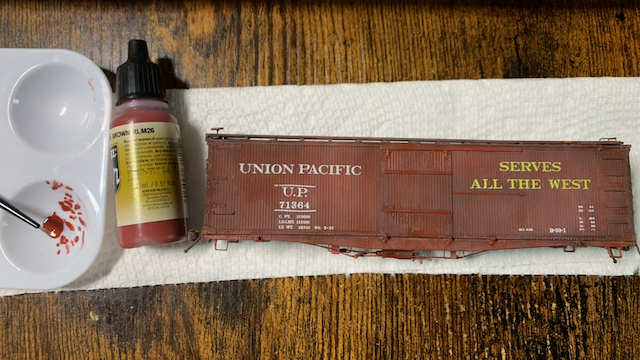
With the oils developing, I wanted to do some acrylic highlights in the meantime. This approach follows Night Shift’s approach to armor – though it will almost certainly require tweaking to work at this scale. First, a color just slightly more red (Vallejo Model Air RLM26 Brown – 71.105) to highlight rivet details:
Then, stripes of Tamiya masking tape were added to allow highlighting of individual boards:

Boards were highlighted in various colors, but mainly dark brown/black:

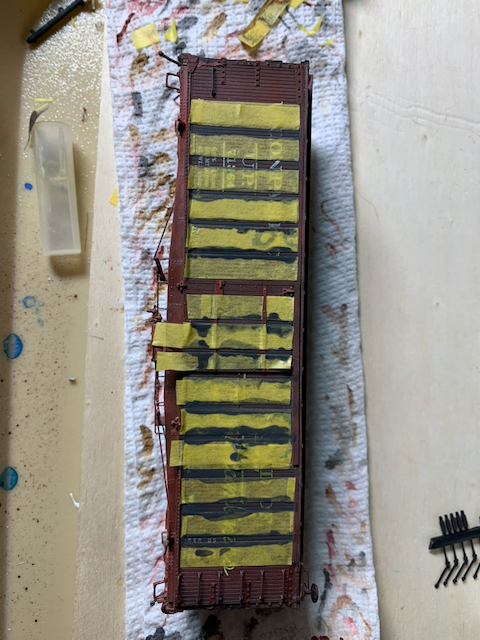
After acrylic application, I used a light semigloss finish to seal it in and prepare the surface for oils. It is clear from this photo that the acrylic board weathering was a bit much. Since acrylics are essentially irreversible in this circumstance, Gable is fated to be excessively weatherbeaten.
While I was out at a Dick Blick clearance sale, I found a few more earthy oils to add to the palette.
Creating a filter or finish with oils, modelers recommend dotting the weathered area with various colors and then blending. The advantage of oil blending is the sheer amount of time and reversibility, features that acrylics often lack.
After blending, the oils allowed the creation of subtly shaded panels:
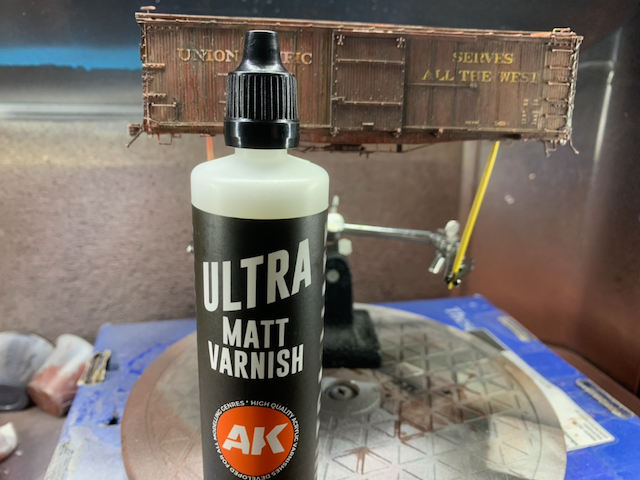
After that, I left it with a light layer of AK Ultra Matt Varnish.
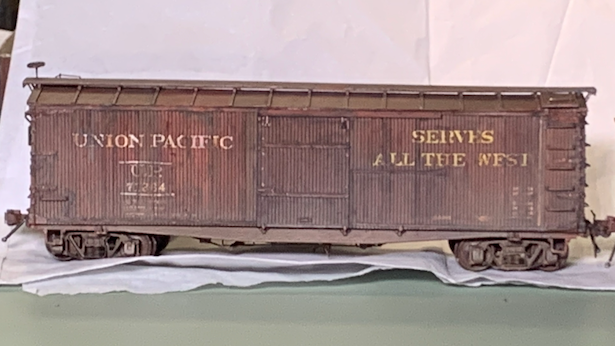
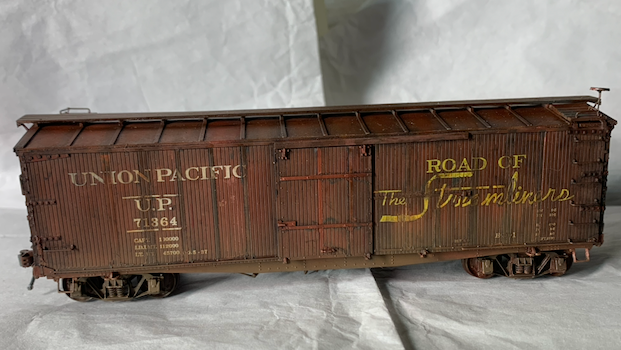
The end result is a perfectly serviceable but beaten-up car. I will pull way back on the acrylic weathering in the future.
Next: Gable’s partner, Project Lombard.