In which we begin a self-made crash course on learning how to paint and weather.
After a few attempts on two junk cars did not yield acceptable results, I split up a sheet of Evergreen styrene car siding into chunks approximating 1/4 of a box car. These would be the focus of my weathering training.
Base Paint Job
First, they were painted in a two-color scheme:
Box Car Red #1
- Black as primer (Vallejo Black 71.057)
- The front side with visible boards: a light layer of Rock Island Maroon (Polly Scale F414248) that is brighter and redder (1:1 with Vallejo airbrush thinner)
- Outer layer on the front: a light tuscan oxide red (Badger Modelflex 16-14) that is more brown (1:1 with Vallejo airbrush thinner)
- Undiluted gloss varnish (Pledge Revive It)
The resulting front was a box car red and the back was black.
Destroying Test Chips
Two rounds of “weathering” went on these. In each case, a subtle variation of a gray wash and/or black oil paint spots were applied, along with any other noted treatments.
| Round | Chip Color Side | Treatment | Result |
| 1 | Red | Black/gray wash Airbrush thinner wipe >24h later | Paint destroyed |
| 1 | Red | Black oil paint spots Turpentine wipe | Paint destroyed |
| 1 | Black | Diluted gray oil wash* | Paint destroyed |
| 1 | Black | Diluted gray oil wash* | Paint destroyed |
| 2 | Red | Vallejo Engine Grime dark gray wash turpentine wipe | Paint destroyed |
| 2 | Red | Black oil paint spots carefully washed with turpentine | Good |
| 2 | Black | Diluted Tamiya XF-19 Sky Grey in airbrush thinner | Good |
| 2 | Black | Oil spots diluted/washed in turpentine | Paint destroyed |
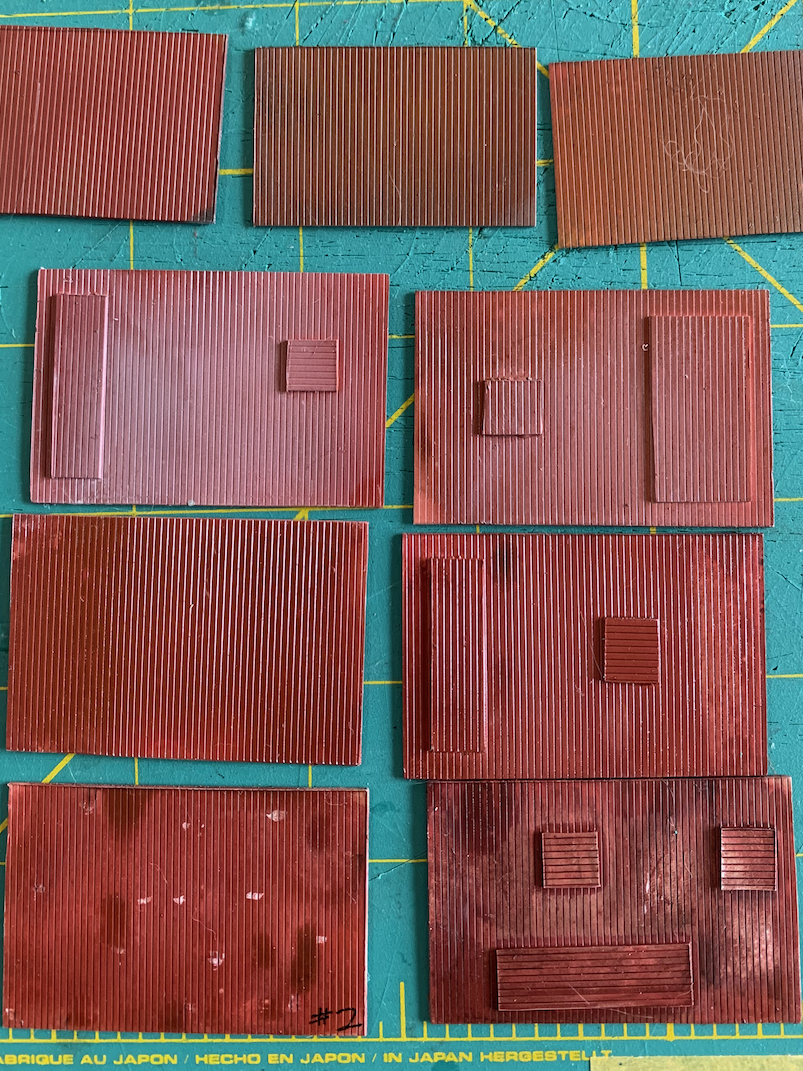
Every “paint destroyed” entry in the table is a model saved from ruin. I tried options that a more seasoned weatherer would likely know in advance not to work. I learned a little here about how to weather; specifically getting the easy mistakes out of the way. But I learned a bit more about how not to weather: now I know firsthand the temptation to over-weather. It was a challenge knowing when to stop, and stopping at the right place requires a little discipline.
The number of times I destroyed the underlying paint suggested that I did not give enough of a protective gloss coat. The physically smooth flat black side has a tendency toward crazing.
Perhaps a quick wash of the styrene in diluted soap would have improved paint adhesion.
A New Chipset for a New Round of Destruction
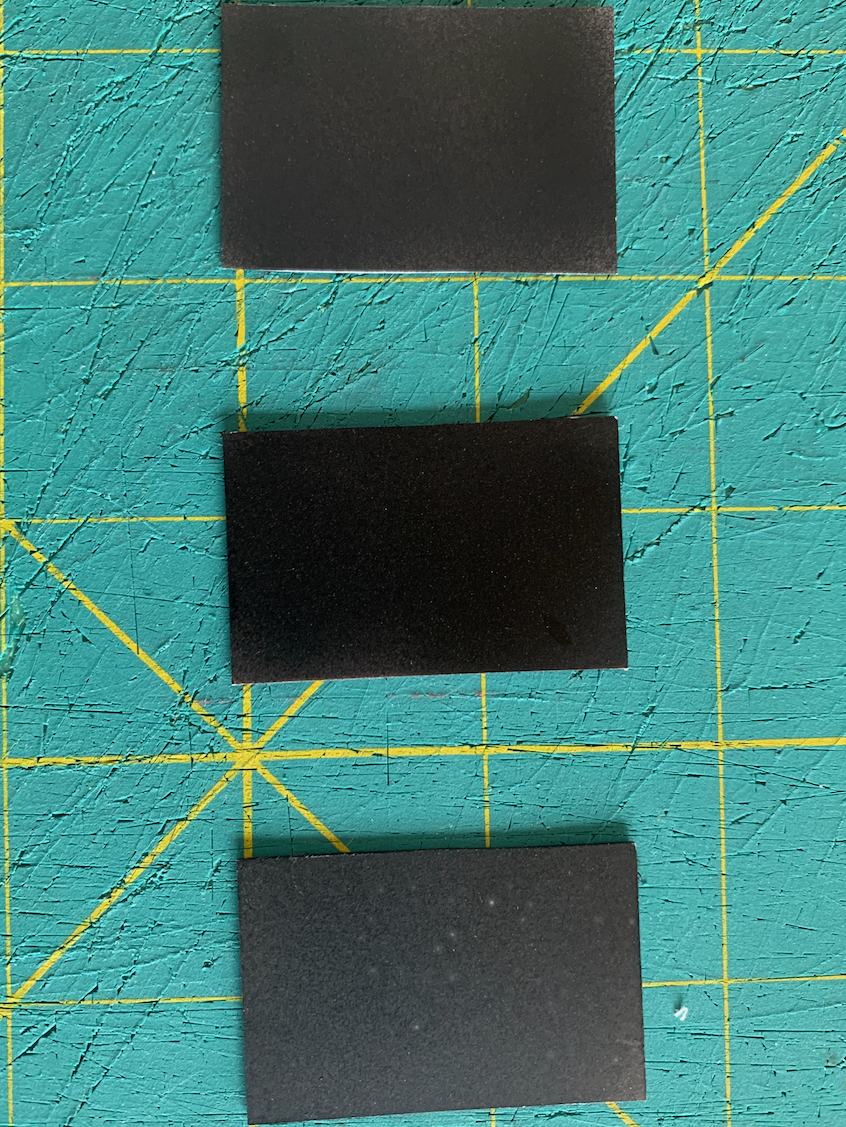
Proceeding with the cycles of learning, an improved paint job was provided to a new set of Evergreen car siding chips: 8′ by 15′ scale rectangles + 3 short ends. To see if the Vallejo black was more prone to crazing than other paints, the chips were partitioned into 3 groups and given a base coat of Vallejo as before, Tamiya flat black XF-1, or Tamiya semigloss black X-181.
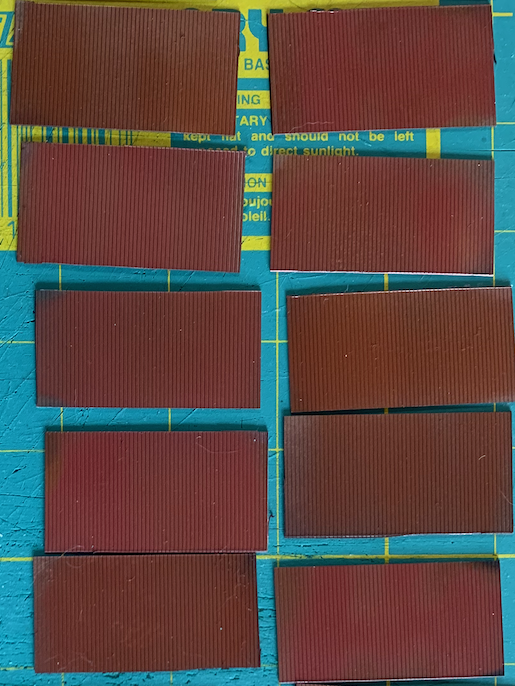
Box Car Red #2
- Base coat: One of 3 black paints
- Layer of Rock Island Maroon (Polly Scale F414248 1:1 with Vallejo airbrush thinner)
- Layer of Vallejo Wood (71.077 undiluted).
- Layer of light tuscan oxide red (Badger Modelflex 16-14 1:1 with Vallejo airbrush thinner)
- Final light layer of Rock Island Maroon
- Undiluted gloss varnish (Pledge Revive It)
To A More Detailed Weathering
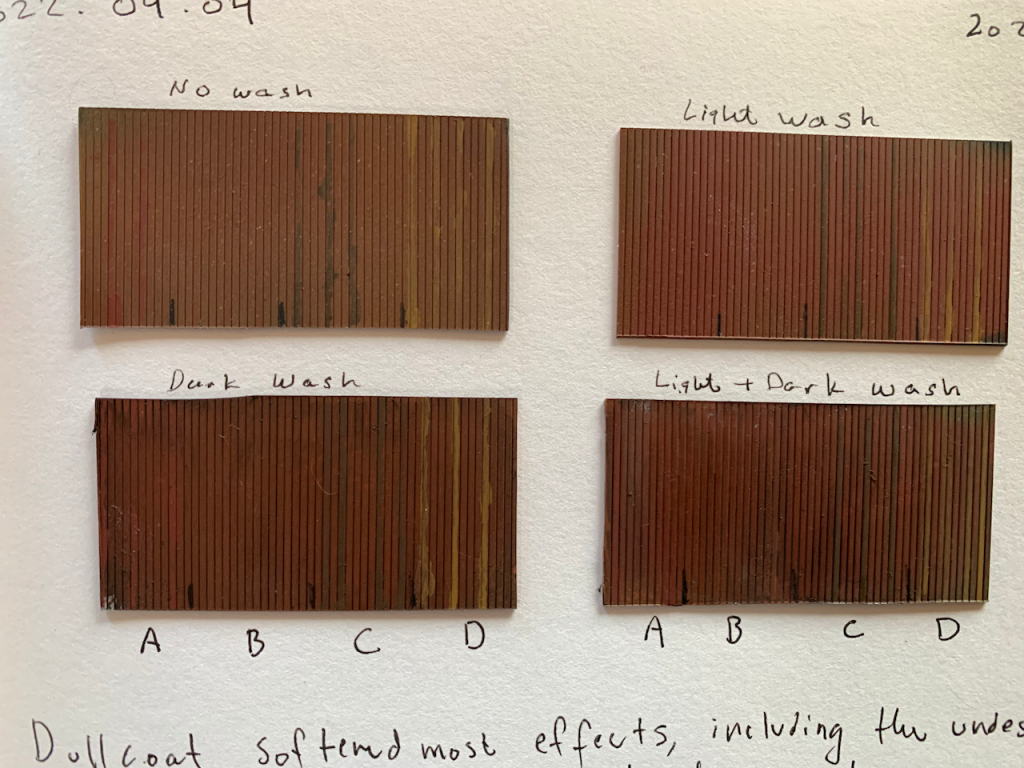
Promptly and with little intuitive skill I returned to performing an enumeration of wash possibilities with a light wash, diluted Tamiya Sky Grey XF-19, and a dark wash, Vallejo dark grey model wash 74.517: light only, dark only, both, and neither.
I again got too much on the boards. Soaking it up via capillary action damaged the surface2. Points of application were high on the board and quickly diluted with Vallejo airbrush thinner.
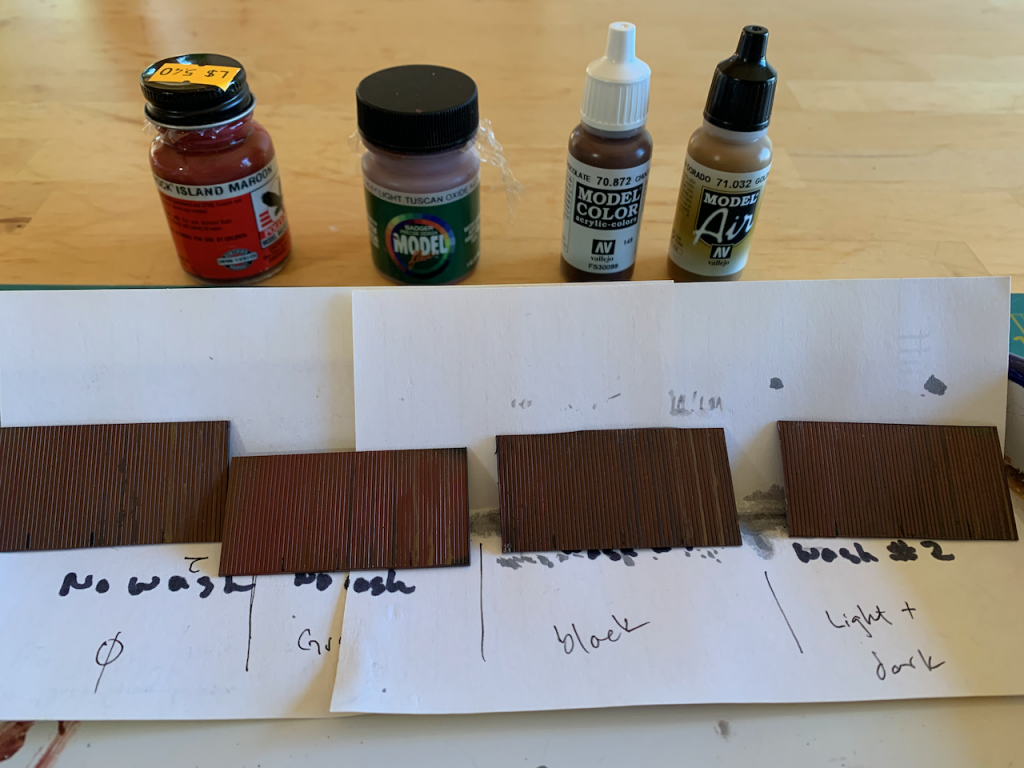
Board highlighting pursued. The test chips were split into 4 regions and has highlighting with one of 4 reddish/woody/brownish colors:
- Rock Island maroon Polly Scale F414248 undiluted
- Light Tuscan oxide red Badger Modelflex 16-14 undiluted
- Chocolate brown Vallejo 70.872 diluted only slightly
- Golden brown Vallejo 71.032 undiluted
After board highlighting, I tried to follow it with an IPA-diluted light overspray of Vallejo light brown 71.027. The IPA caused paint precipitation. This task was finished by diluting in airbrush thinner.
The results were both greatly improved and still not nearly where I need them to be:
Preparing for the Next Kit: ATSF Mineral Brown
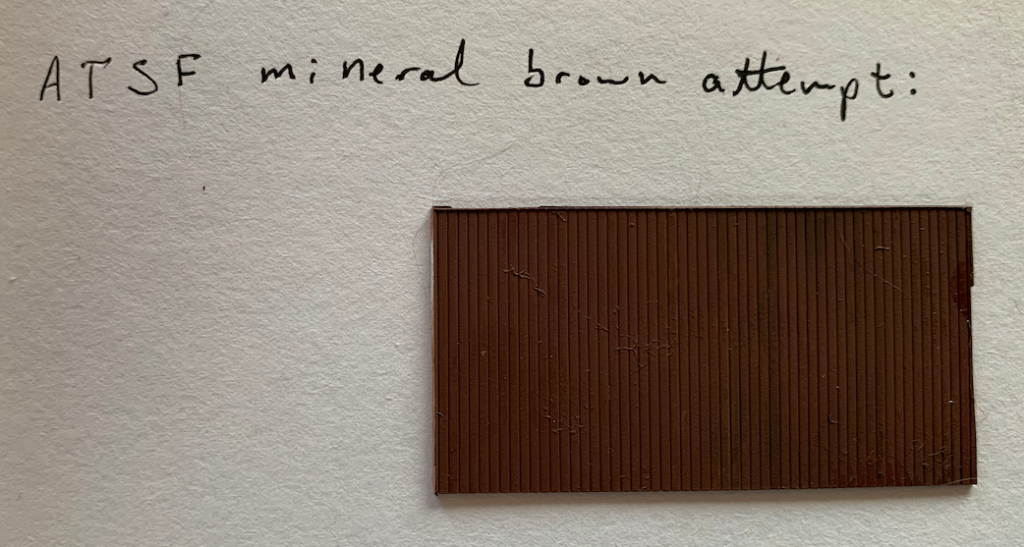
Much of this dramatic saga was laying the groundwork for a Westerfield ATSF Bx-12 box car kit. Many Santa Fe cars of the 1930s era were in a mineral brown color that is thought to be well-represented with Vallejo rust 71.080 per Joe Fugate’s guide.
As I over-enthusiastically painted up the entire set of test chips I had available, I simply added an overspray of Vallejo rust to the box car red chips, light enough to leave slight color variations from the other reds showing through. The chips were lightly coated in another layer of gloss coat as well.
Next, I repeated the board highlighting process on the ATSF chips and then oversprayed with a light layer of rust to tone down the effect. Incidentally, this was the first time I tried Joe’s suggestion from the painting guide of using ArmorAll auto glass cleaner and it worked so well I am adopting it.
This time I finally contained my enthusiasm enough to get a level of subtlety I sought.
Nailing that Gray Wash
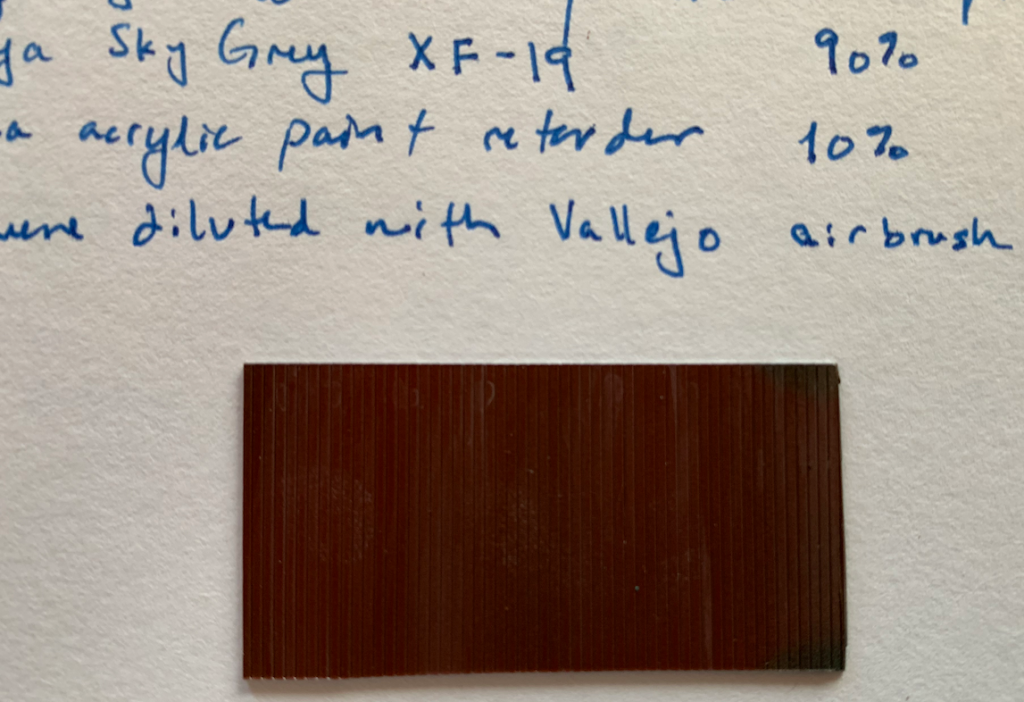
Still not content with the gray wash despite the rest of my results going from bad to acceptable, I decided to fight physics and try to get a slower, gentler acrylic wash with Tamiya acrylic paint retarder. Following the instructions, I did a 90%:10% sky grey XF-19:paint retarder ratio. This was further diluted in Vallejo airbrush thinner.
Finally, I have an approach that I am willing to use on models. With more practice applying the wash, I may even start to like it.
Link of the Day
Eric Hansmann on the resin freight car mailing list pointed out a build note post that reflects a level of modeling to which I only aspire in the long term:
Yarmouth Model Works AC&F Armour Reefer by George Toman
Endnotes
1This was a minimalistic way to see if it is the brand-specific formulation or the low-hanging glossiness property.
2Incidentally, I somehow just learned how well capillary action can clean up accidental excesses of cyanoacrylate adhesive when assembling plastic or resin kits.
